
Complete first-study tutorial
This tutorial takes you from an account to an inspectable research hand-in. Use demonstration data and a narrow question. Allow time for agent execution and review; completion depends on available runtimes, source access and review services.
Prepare
You need a signed-in Lykeion account, permission to use or create a workspace, and a computer with a supported authenticated agent CLI. The download page offers the desktop app with its daemon and a prebuilt CLI for remote computers. You do not need a source checkout for these hosted setup paths. If your lab supplies a connected machine, ask which runtime you may use.
For the example, ask: How does sleep affect memory consolidation? Request a sourced account of current evidence, competing explanations and limits. Do not upload confidential participant data for a first exercise.
1. Set up your workspace
- Follow the Welcome screen to Laboratory.
- Choose Create a new workspace, enter a name and URL, and review the study card prefix.
- Select your laboratory configuration and continue through Skills and Connectors.
- Confirm you are in the intended workspace before creating work.
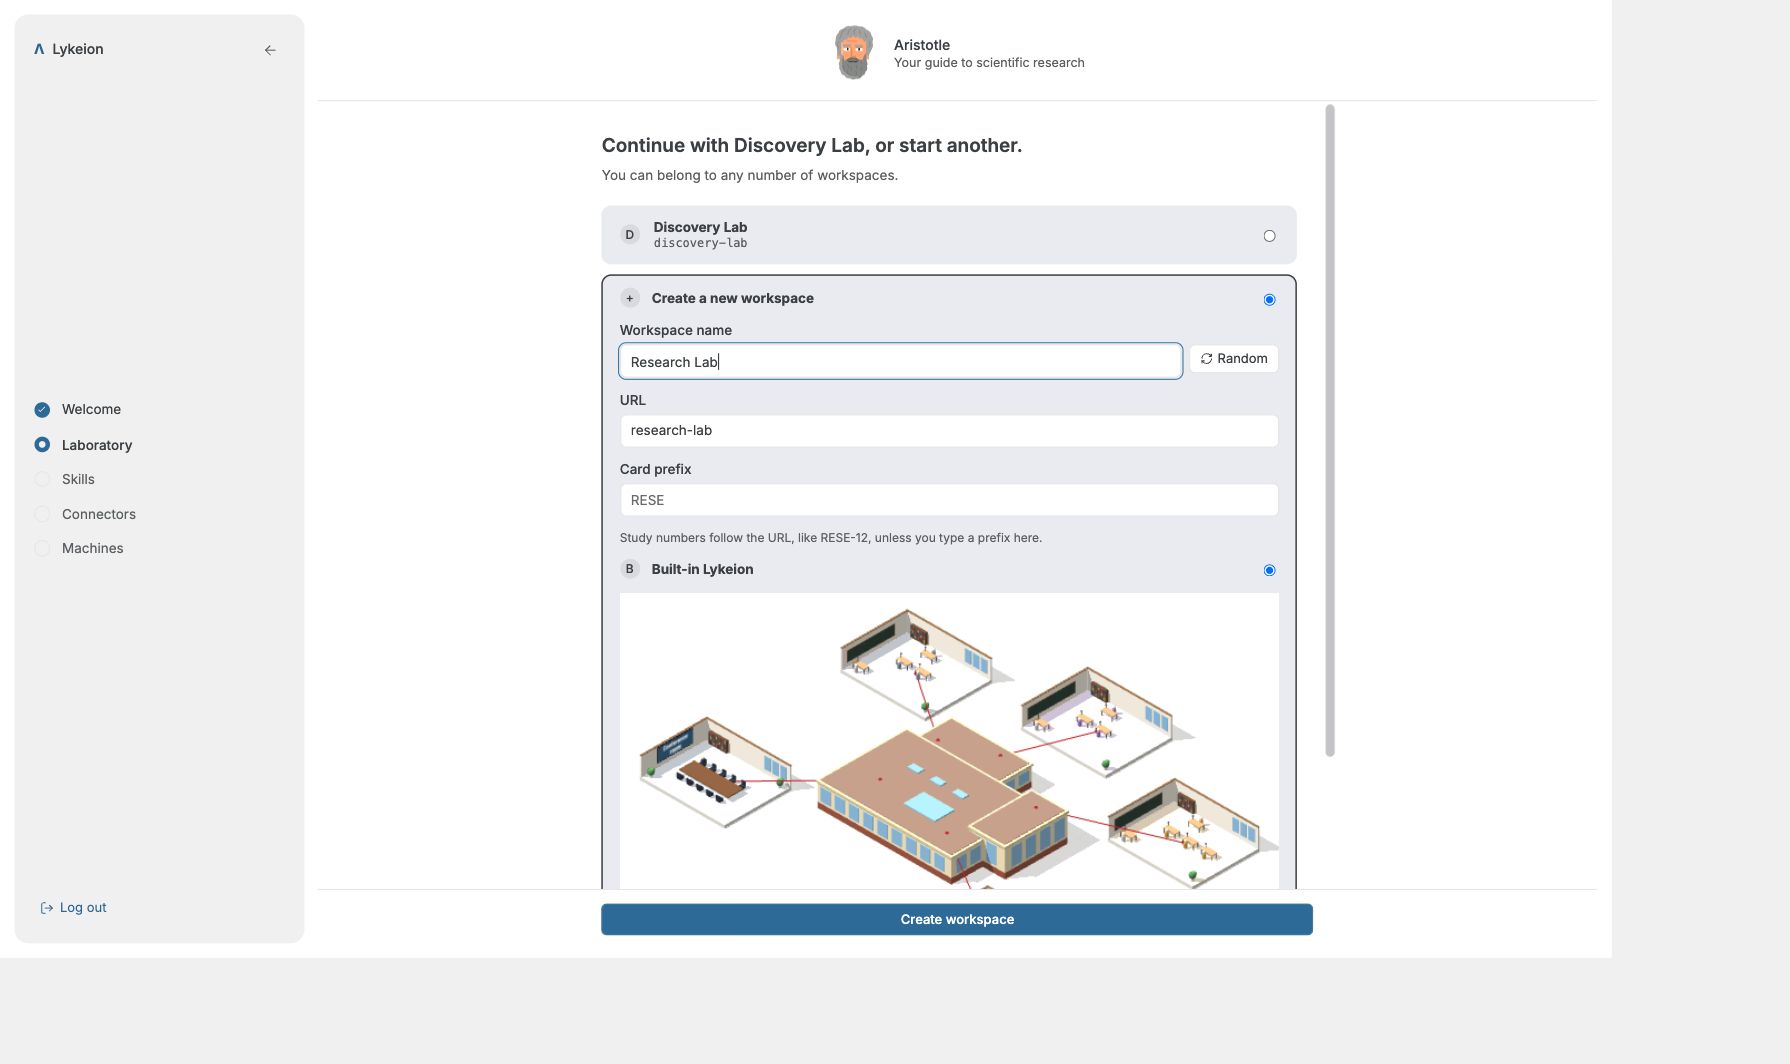
This capture shows the setup form, before submitting another workspace. Existing members can select their lab instead. See workspaces.
2. Connect execution
Install the desktop app from the download page for your own computer, or follow its prebuilt CLI instructions for a remote macOS / Linux machine. Install and authenticate Claude Code or Codex there; Linux also needs bubblewrap. For the CLI, sign in to Lykeion, choose your workspace and start the daemon. Then open Settings → Machines to check runtime availability. See connect a machine for the steps; the source-build dialog is an alternative. Keep credentials in the terminal flow; do not paste them into a study.
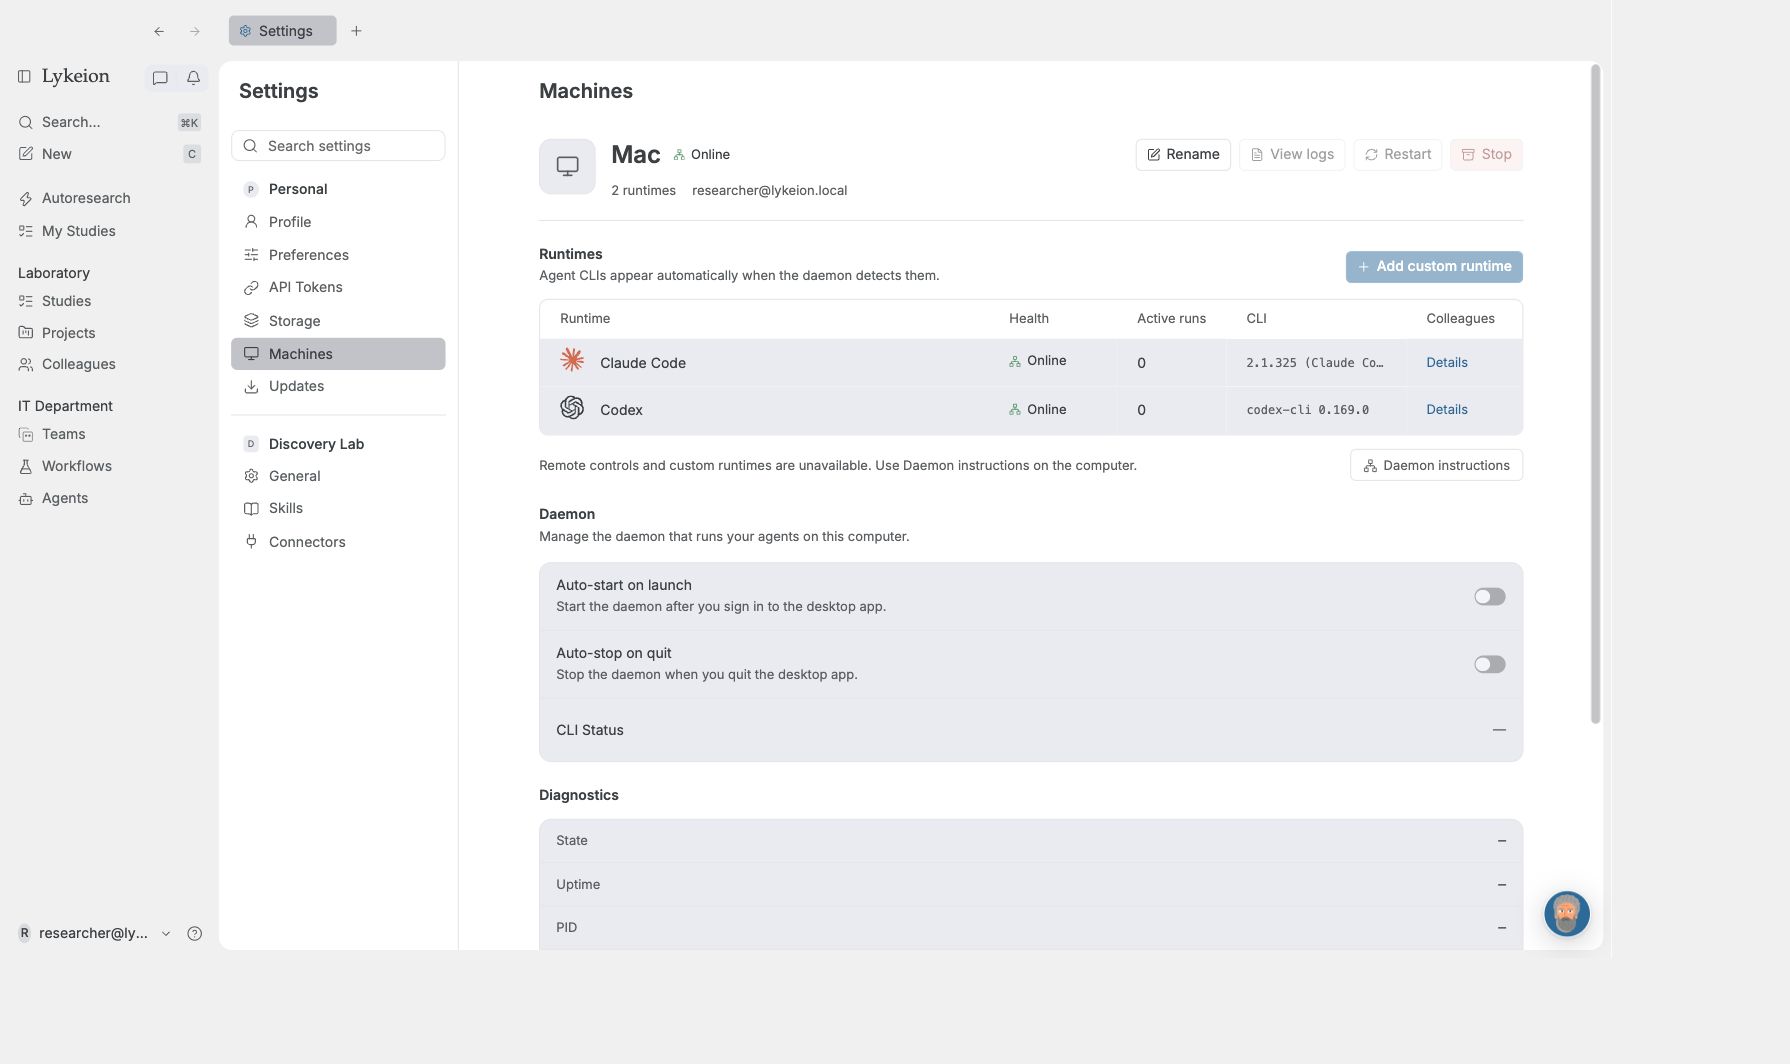
Both demonstration runtimes show Online under Health. Open the image for the full runtime view.
Check that the desired runtime is online and usable. A machine's presence in the list does not establish that every CLI on it is authenticated or healthy.
3. Describe and assign a study
- Open Studies and create a study.
- Use the example question as the title. In the description, request citations, competing explanations and a list of inaccessible sources.
- Choose an appropriate agent or Team and review the stage scope. For your first exercise you can keep the scope bounded to Grounding.
- Check the assignee, stage scope and required inputs, then select Create study. Check a bound machine in the agent configuration, or availability in Settings → Machines; the manual study composer has no machine selector.
- Record the resulting study identifier so you can return to it.
Use studies for assignment details and Teams for coordinated stage work.
4. Follow progress
Open the study from its board card. Read Activity, expand agent cards and look for a hand-in, a running attempt or an explicit blocker. Check Review before assuming the stage has passed.
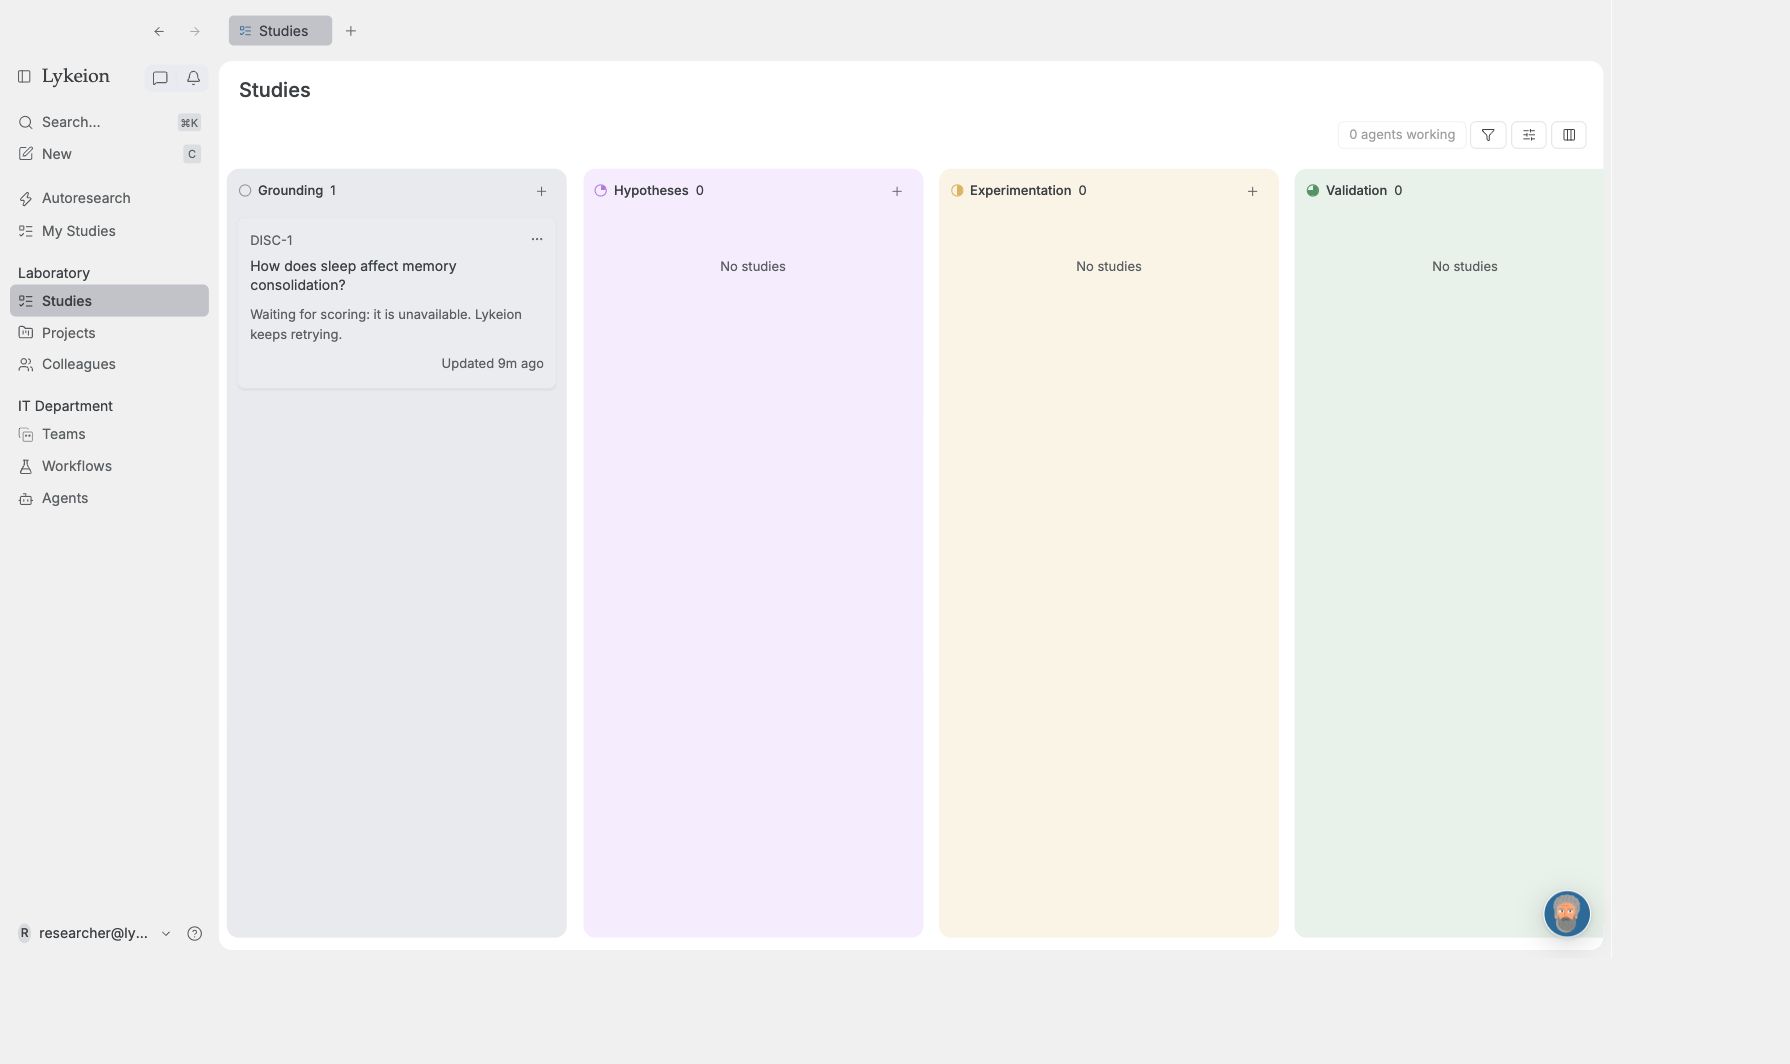
The demonstration produced real hand-ins, but scoring was unavailable. This is a blocked intermediate state; it does not verify later stages. If you see the same condition, resolve the reported service issue rather than treating the study as Done.
5. Review results
When the study has a final report, select Go to the report in Activity to open its final hand-in and evidence graph. The action appears only for a finished study with a stored report; unfinished or stopped studies, Workflow runs and older studies without a report do not show it. The local demonstration studies are waiting for scoring, so they do not yet have a finished report. Report access is described from the implementation; it was not verified live for these studies.
Read the hand-in and follow its source references. Compare the answer with your requested scope. Open Files for produced artifacts, Notebook for recorded computations and Review for available checks and their explanations. These surfaces can be empty when that kind of record has not been produced.
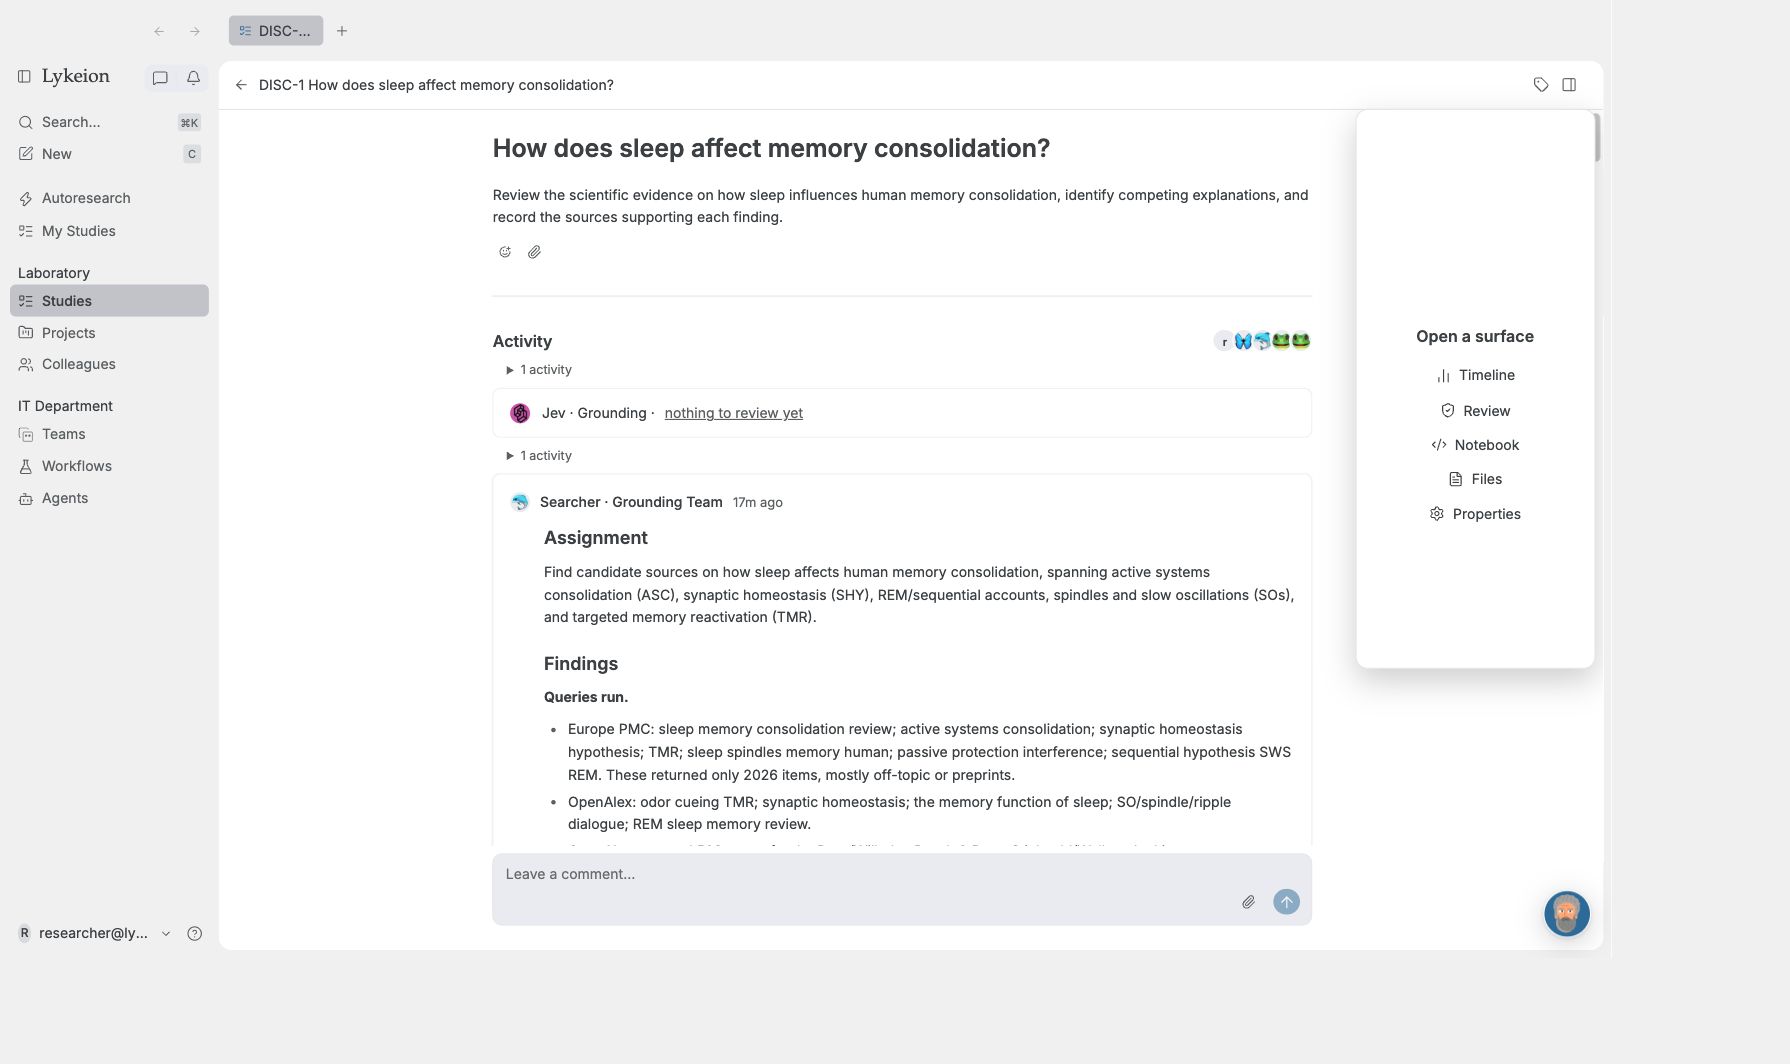
This detail identifies the Searcher hand-in. Open the image for the full study screenshot and its assignment and findings.
This is a hand-in to inspect, not a passed validation. Record what the evidence supports, what remains unresolved and whether another stage is needed. See evidence and results.
Finish the exercise
You should now be able to find your workspace, identify the execution machine, reopen the study and inspect a hand-in or explain its blocker. A full study is complete only when every configured stage and required review finishes. The pictured demonstration is waiting for scoring after its Grounding hand-ins. Read the actual state of your study before continuing to later stages. Use troubleshooting when your observed state differs.